Follow me! Click the logo on the left of this page! Happy Pinning!
Showing posts with label dyi. Show all posts

Tuesday, July 21, 2015

Gone With The Wind Baby Clothes

I attended a baby shower of a coworker whose baby she named, Rhett because of her love for Gone with the Wind. I looked all over for quotes. I know I wanted to take onesies and make them cute. The Frankly My Dear I Don't Give A Damn quote had to be on one of them for sure. I wanted it to be kid friendly so I came up with Poop instead of Damn which I thought turned out super cute! All I did was insert a mustache and typed the quotes in Microsoft Word, printed them off and took them along with the onesies and took them to a screen printing store.
Enjoy!

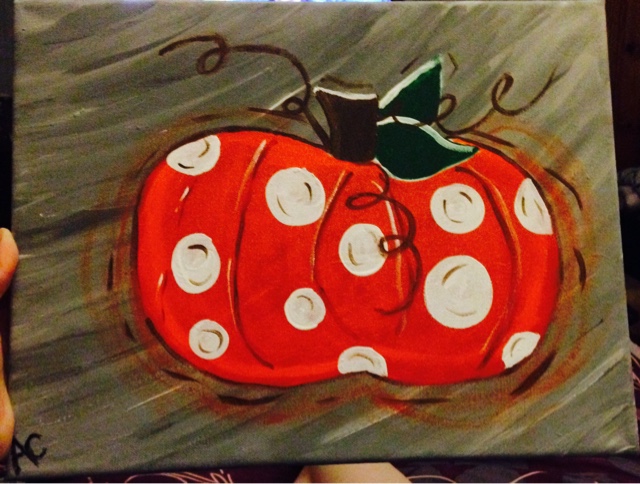
Acrylic Paintings

I strongly suggest going to a Painting with a Twist class or some sort of paint class to learn different techniques on how to paint backgrounds. Some images where found on Google Images for inspiration. I will be updating this post each time I paint something new. Enjoy.


Not too fond of this one:


4th of July Door Hanger Wreath


First of all please don't kill me! I know it's been over a year! This is an easy wreath for 4th of July, Memorial Day, Veterans Day or any day.

Inspiration found HERE

What you need is:
Wreath Form:
Yarn of your choosing:
Foam Stars (Got in Craft Dept at Wal-Mart)
Hot Glue
Scissors

PROCEDURE:
Begin wrapping yarn around wreath form. I tied mine in a knot on the first loop.
Continue until you have the desired width of color.
To switch colors easily, just cut and tie to the next color:
Continue until you have completed the wreath. Hot glue the stars onto the wreath form in any order you want.

Viola!

Thanks for visiting and please subscribe!

Sunday, May 4, 2014

Easter Egg Wreath

Materials:
Plastic Easter eggs
Wreath form (I used pipe installation)
Hot glue
Ribbon

Instruction:
Tie ribbon around wreath, then glue eggs all over to your specifications. Have fun!

Sunday, September 29, 2013

Halloween Eyeball Wreath

Materials
Packs of eyeballs from The Dollar Tree
(I used 8- wish I had more)
Black fun fur
Pipe insulator ($0.97 at Home Depot)
Duck tape
Hot glue
Floral wire

Procedure
Cut a portion of the insulator and duct tape it into a round wreath.
Wrap floral wire around the top to form a loop to hang it by.
Start hot gluing eyeballs all around.
When done hot glue fun fur in the bare spots.
Hang and enjoy!


Saturday, September 14, 2013

Easy Maxi

Materials:
Fabric (Measure the fabric around you 1 1/2 times or 2 times and have the clerk at the store cut it for you.)
Elastic (Wrap around you pretty tight then cut it. You want it to gather)
Saftey Pin.
Tank Top
Sewing Machine

Procedure:
This HERE is the best tutorial that I could find for the elastic part.
I bought a ton of colored tanks at Wal-Mart on clearance $2.50.
Found some cute material and the rest is history.
All are knit material except the short one, that is all cotton.
Just cut your tank top short mid rib, then after you complete your dress, I use a zig-zag stitch to connect the top to the bottom.
For the hem I just pined and sewed. I don't like ironing so that was out of the question too, LOL.

Quick tutorial for the dress.
Fold good sides together and sew all the way up the side.
Then for the top of the dress fold over about an inch at least wider than your elastic and pin it all the way around, then sew next to the end of the fold making a pocket for your elastic.
Leave an area open for your elastic.
Take the elastic and add a safety pin at the end of it and pull it all the way through. Connect both ends with the safety pin. Then try it on and see if that will work. That way you can always cut more off so that it is not that loose. Once you have the right size sew the elastic together. Then sew the dress band up.
Make sure when you put your tank inside the dress before sewing that you have right sides touching right sides.
Zig zag it all around.
Done!


Minecraft Birthday Party

For my sons's 10th birthday he wanted Minecraft theme. What you need is a ton of boxes and construction paper. Let your imagination do the rest.

For the food bar I downloaded a Minecraftish font HERE.