Follow me! Click the logo on the left of this page! Happy Pinning!

Tuesday, November 27, 2012

Christmas Light Wreath

Ok I have a tad ADD in my blood. I start projects then start other ones before I finish. Well my grandmother gave me a bag of her old Christmas lights.

I unscrewed them from the wires then hot glued them all over my homemade wreath form (made out of pipe insulator) then had a wooden C initial and painted red glitter glue all over it, glued that to the wreath and then Glued more lights around it.

Once again....not to shabby but super heavy!!

Stocking Pole

I don't have a mantel or anything like that for the stockings. We usually tack them to the wall looking "tacky"!!!!!

So I was thinking to make some sort of pole with hooks. I found an old wooden curtain rod, used some pink ribbon wrapping paper and wrapped it sealing it with fabri tak glue...tied it off with a sheer pink ribbon tied in a cute bow then I put styrofoam in the bottom of a mini hat box along with some pink yarn then tied the ribbon that is stuck on the box around the pole and stuck a tack through it to the baseboard. Then I got some little hooks and screwed them up and down the pole on opposite sides.

I think it turned our pretty cute!

A Colorful Christmas

I am a huge supporter of breast cancer research so I adore the color pink, I obsess about the color. I vowed last year that I was going to have a pink themed front porch next year. Here is my go at it.

My husband made the cupcake topper out of a nerf ball, whiffle ball (cherry), pillow batting, card board, foil and sequins.

I found some really cute polka dot pink material and a brown burlapish material for my tree skirt. I had some left over so I made 2 pillows to match the skirt and enough to cover my little table.

I'm pretty satisfied with it :)


Friday, November 23, 2012

"Tom's" Knock Offs

Materials Needed:
Fabric shoes...I got mine at Wal-mart for $9
Glitter Glue (opt) got mine at $ Tree
Paint Pens

Procedure:
Since I had red shoes I got red glitter glue. I smeared the glue all over the tip section of the shoe and along the back section as well as the trip around the top part of the shoe.
Then I went a little overboard crazy, lol, I made these while watching Once Upon A Time ;)
Let dry.....viola!
I will probably do some other ones with only glitter next time!


Fall Wreath


Materials Needed:
Insulation for pipes for the ring
Wooden letter for monogram
Scrapbook paper...your choice
Your choice of accessories for the wreath
Floral Wire for the hanger
Burlap, opt (I covered the ring with it...you could use anything you wish)
Hot Glue

Procedure:
Make wreath by duct taping a ring out of the insulation for pipes
Wrap the burlap around the wreath and hot glue the end
Wrap floral wire around the top and make a loop to hang it with
I used scrapbook paper to cover the wooden letter for my last name
Hot glue flowers and leaves and swirly sticks
Viola!

I had no inspiration for this one, wow...I know.....lol


Snowman Pillow

Materials Needed:
Any pillow....I used one of those Sobakawa pillows because it is terrible to sleep on, lol
Scarf....any one you like....a friend gave this one to me.
Santa Hat
Paint Pens
Orange pom pom
Fabric Glue....I use Fabri-Tac
Red Glitter glue (optional) .... got mine from the $ Tree

Procedure:
Simply tie the scarf to make the "head"
Stuff the pillow into the Santa hat
Smooth out the face
Use paint to do the eyes and mouth
Use fabric glue to glue the nose on
Smudge red glitter for cheeks...if you want....purely optional.


Inspiration found HERE


Sunday, October 14, 2012

Butterfly Wall Art

HERE is the inspiration.

Materials Needed:

Butterfly wall stickers from $1 Tree (these were pink and I just took a black sharpie and colored them all)

Process:
Stick them to the wall any way you like.

I have sense taken this down, but it was cute while it lasted!!


Toilet Paper Roll Wall Art


You can see all over Pinterest some really cool things to do with toilet paper. I have a board dedicated to it! See that HERE.

Here are some of my creations:
Inspiration for this one HERE

  Inspiration for this one HERE


Inspiration for this one HERE


 Inspiration for this one HERE


Made these two as gifts

"BerFlops" Flip Flop Designs

My "BerFlops" Creations:

Materials: I used all from Hobby Lobby (fun fur, balloons, weave loops and bling) These are just a couple of the different designs I have done...all of these were sold for a charity auction for breast cancer at my workplace :)


T-Shirt Bracelet

My attempt at the pin I found HERE


It's ok...just a little bulky :)

Fred the Elf is at it again

Different ideas. When all was said and done, Fred left the boys gifts before Santa suspended him :)


Saturday, October 13, 2012

Spooky Ghost Milk Jug


Materials Needed:

milk jug
sharpie
glow stick

Procedure:

My 9 year old got his inspiration HERE.
He took an empty milk jug, made it look like a ghost, then we snapped and shook a glow stick and threw it in! Viola!


Cool spooky dead tree

My inspiration for the project is HERE

Materials needed:
Flower pot
old brick
pine cones and needles
funky branches
clear twine
construction paper
Cricut Expression 2
Wild Card cartridge

Procedure:
My 9 year old ran around our house grabbing really cool branches from the ground (hey, this helped clean the yard too, lol)
I had an old brick laying on the side of my house, I put it in the flower pot, stuck the branches down in the holes, then we ran over to the park where there are pine trees and picked up some cones and needles. (be careful...these are sharp!)
I lined the bottom of the flower pot in the cones (this is optional)
(looked kind of cool just like this)
Next I cut out a bunch of bats with my Wild Card cartridge, then hung them with clear twine on the branches alternating around.
I think it looks wicked!


Halloween Door Hanging


I got my inspiration with this pin: HERE

Materials needed:
3 foam plant wreath rings (got at $1 Tree)
Hot glue
Halloween tissue paper
Ribbon
Cricut Expression 2
Jubilee and Wild Card Cartridges
Duct Tape

Procedure:
I did one ring at a time.
Wrapped with tissue paper, secured with duct tape (I used black) Then around the outer edge completely went around the ring with the duct tape for a smoother look.
Hot glued each ring together.
Cut out letters with Jubilee cartridge.
Used Wild card for the spiderweb.
Put letters on the rings.
Added ribbon to the back of the outer rings with duct tape and hot glue.
For an optional touch, I cut out circles the size of the rings to add to the back of each one to cover up the duct tape mess.

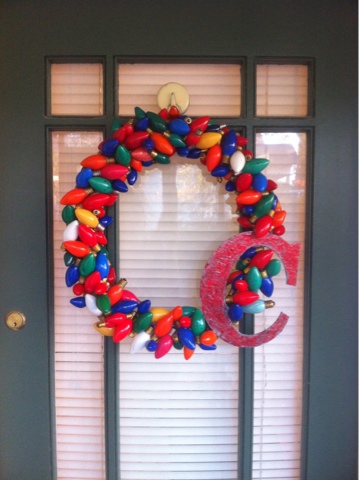
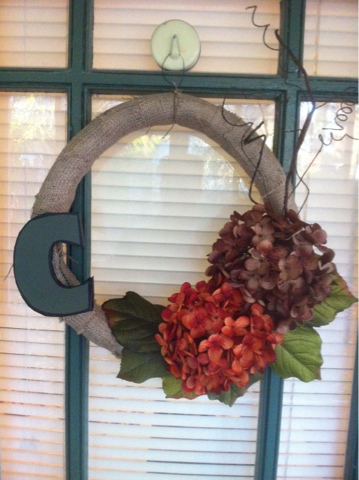
Here is one my friend asked me to make for her:


Halloween Pumpkin Decor


Materials Needed:

Pumpkins (duh, lol)
Ribbons
Cricut Expression 2
Vinyl
Cute Font Cartridges (I used Wild Card)

Procedure:
I used vinyl for these pumpkins.
Loaded my cartridge in my Cricut, cut out the letters, place on the pumpkins.
Found the Halloween card section on the cartridge, cut out spider webs, bats and spiders and placed on the pumpkins.
Added ribbon
Viola!

You can find all kinds of ideas on Pinterest!

Duct Tape Fan Decor


I took really cute duct tape and completely covered my little battery operated fan for work. I think it looks adorable...can do this with many different things!

You can find even more ideas on the wonderful site of Pinterest!

Fabric Flowers


Materials Needed:

Some sort of material (the ones above are tshirts)
Glue (I used Fabri-Tak)

Procedure:

These took me a bit to get down. I watched countless videos on how to do this, then one day it just clicked.
Start cutting thin strips (about 2 inches or so) of material (t-shirts), then fold it over long ways.
Fold again until you have a thin string.
Start rolling and twisting out and secure with glue as you go.

You can add to pony tail holders, hair clips and I even embellished a picture frame for Christmas:


Chocolate Covered Spoon Gift

Materials Needed:
Plastic Spoons
Hershey Bars
Peppermint Extract (optional)
Marshmallows
Candy Cane
Boiling Water
Glass Bowl (my homemade double broiler ;)
Twine
Little treat bags (1/4 of them you will cut up)
Wax Paper
Hot Chocolate
Holiday Ribbon (optional)


Process:
Melt your chocolate in the bowl over a pot of boiling water, stirring in peppermint extract if you want.
Take one spoon and dip in chocolate to coat entire portion of spoon.

Place on wax paper to dry:

Take your candy canes and crush them:

Before spoons dry all the way sprinkle your candy cane pieces on the spoons:

Take your treat bags and cut them in half.


Then cut them in half:

Take your twine and cut enough to tie your bags:

Place your spoons in the bags and wrap them, tying off with the twine:

Put inside full baggies, add hot chocolate and pour loose marshmallows in the bag, tie off with cute decorative ribbon: